A while back, Jan at Daisy Janie Organic Fabrics posted an idea for a Project Linus quilt. In a nutshell, she was looking for quilters to help by making blocks for a quilt. She would send out charm squares to anyone interested, we would make the block, send it back, and she would assemble the quilt. I've been wanting to try her fabrics for a while, and I love the idea behind Project Linus, so I jumped right in.
The instructions were simple... make a block.
No specific pattern, no size limitations, etc. Just make a block using the fabric she sent. I played around a bit in my mind and ended up with this:
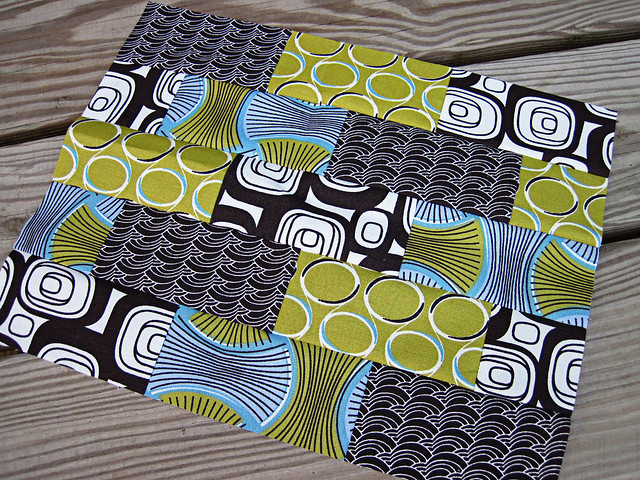
And here's a tutorial for it!
One small note... this is a rectangular block. Finished size is approximately 10.5" x 14.5". However, if you wanted to make it a square, it would be easy enough to alter. I wanted to use as much of the material as possible, thus the rectangle shape.
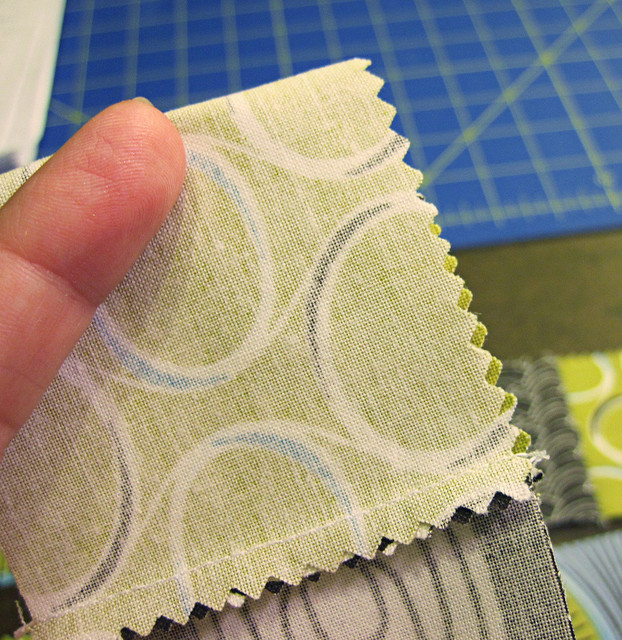
To start, choose eight 5" (charm) squares.
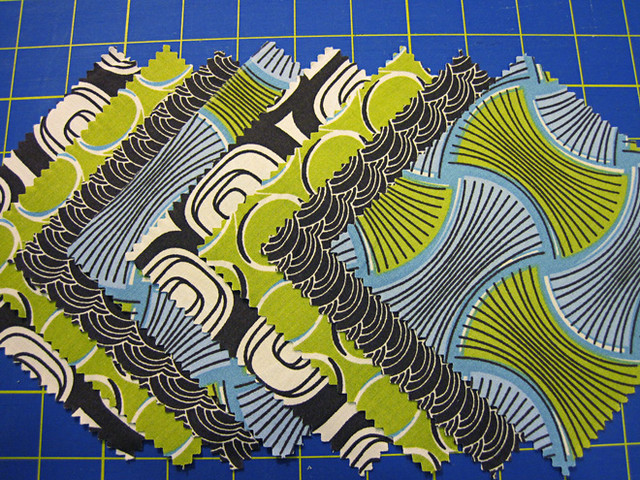
Featured here are (left to right) Hip Squares, Crystal Ball, Caravan, and Bundles from Daisy Janie's Geo Grand collection.
Cut each square in half to make a total of sixteen 2.5" x 5" strips.
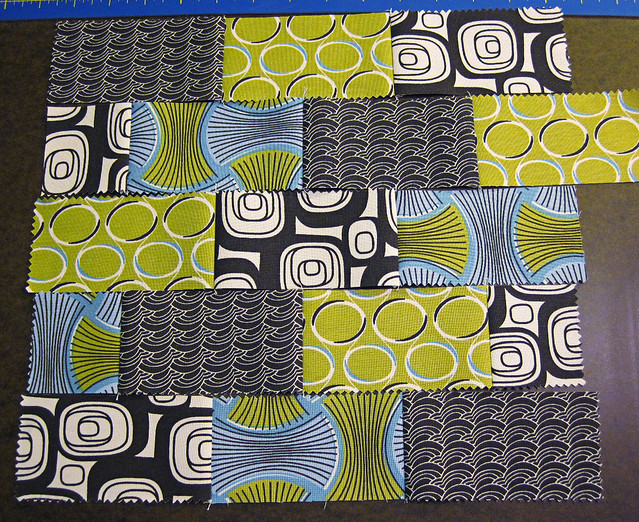
Once cut, lay out your strips in such a way that they look like bricks stacked on top of each other. I chose to lay mine out in a stairstep fashion, alternating the green and blue with the browns.
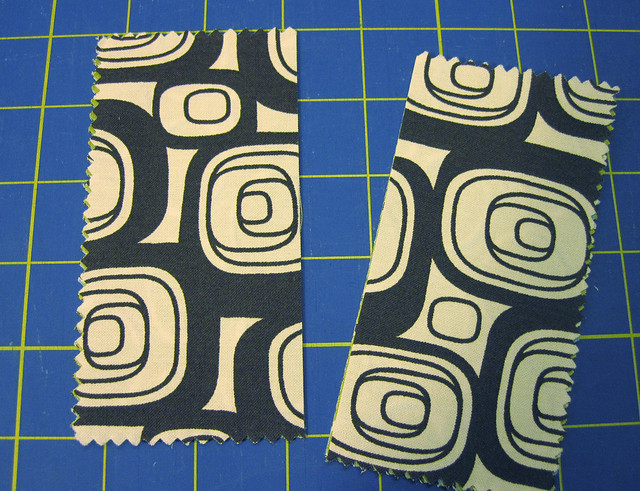
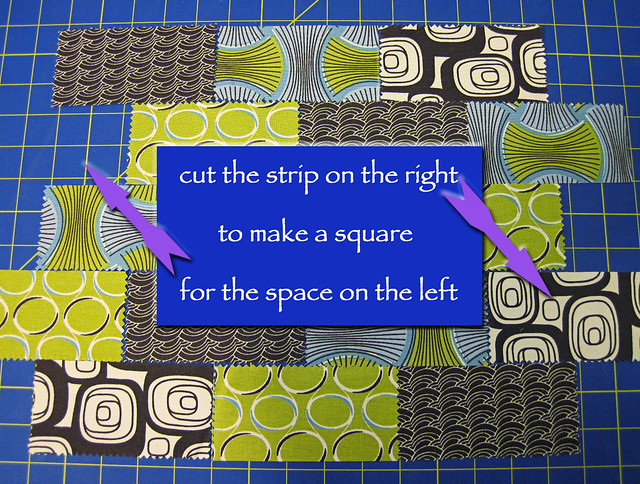
As you can see, some strips will hang off the sides. For one of them, you will need to cut a strip in half to fill in the hole on the second row (see below). I cut the brown (bottom right) to fill in the hole (top left) so that the pattern continued.
For the other danglers, you have two options on cutting.
Option 1: cut them into 2.5" squares like so...
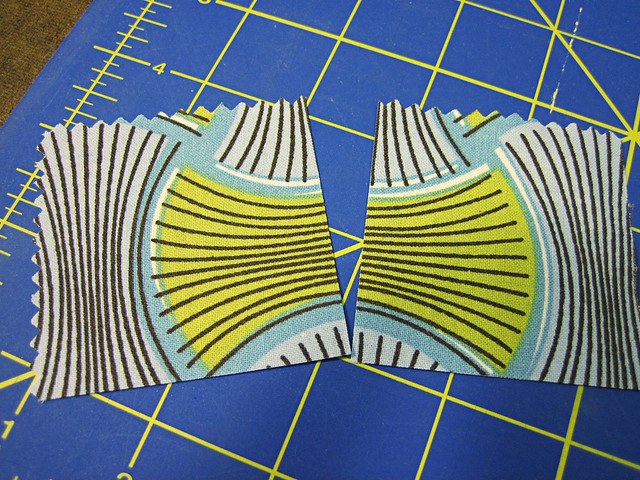
...and attach them when sewing.
Option 2: leave them as-is and attach, trimming at the end.
I chose both - I chose to cut the Bundles (green/blue) strip and leave Crystal Ball (green circles) strip so you could see each.
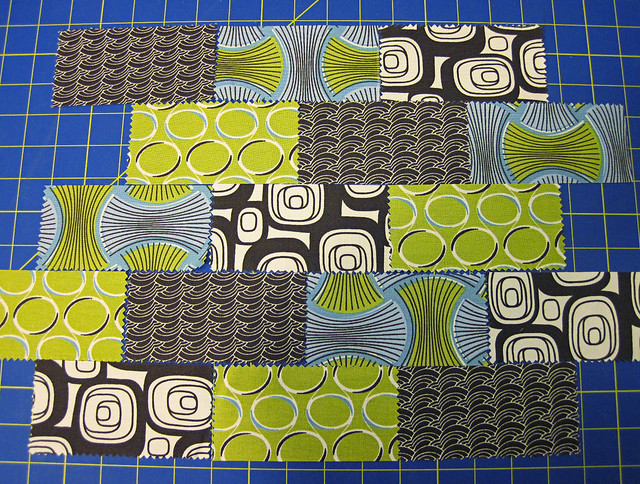
Now, using that infamous scant 1/4-inch seam, sew your strips together to create five rows.

You should end up with something like this (remember, the green is the dangler I left in):
Don't panic if the rows aren't the exact same length. Some have more seams than others, which cuts down on the row length. For instance, in the photo above, you can see that the fourth row down is shorter than the row above and below it. That's OK.
Now, because the rows are uneven, we aren't going to line them up at the edges to sew them together. Instead, center the rows by folding the top one in the center, finger-pressing (no iron needed), and matching the crease to the seam below it in the second row.
Clear as mud? OK step by step...
Take Row 1 (at the top) and fold it in half.
Finger press to make a slight crease.
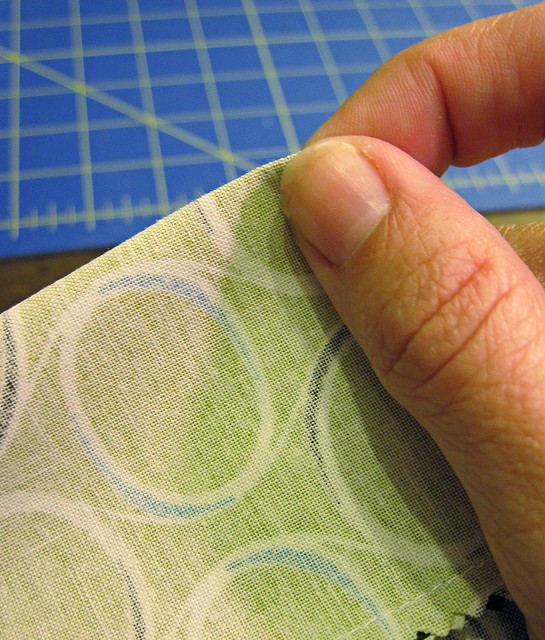
Pin to Row 2 (right sides together) so that the middle seam of Row 2 matches up with the crease you just created in Row 1.
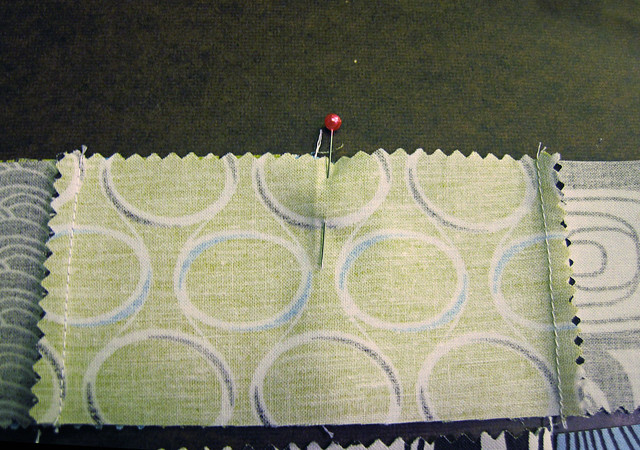
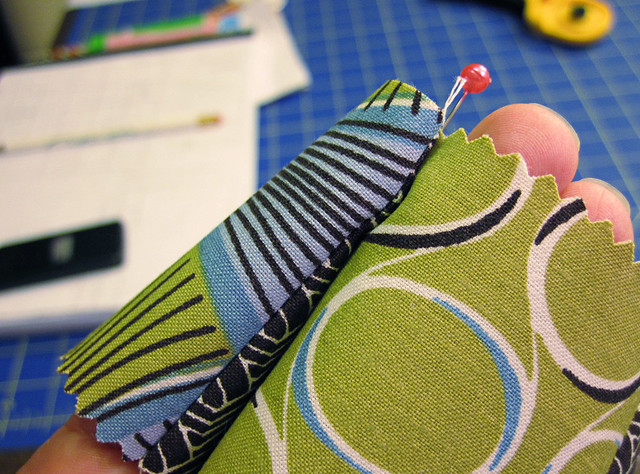
Sew Rows 1 and 2 together, using a scant 1/4" seam.
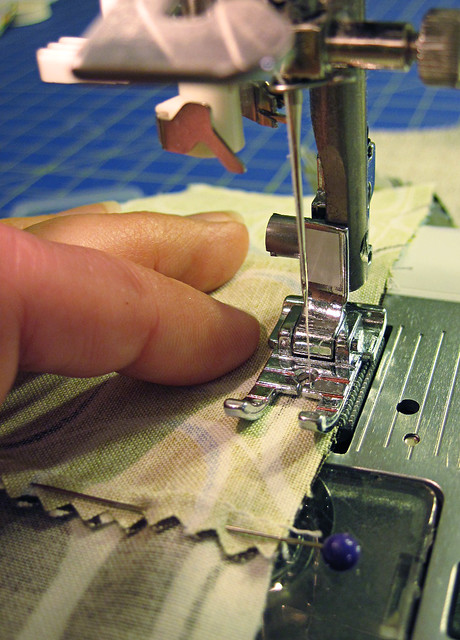
Continue the same process by finding the center and sewing each row together, folding to create a crease and matching it to the center seam in the adjacent row.
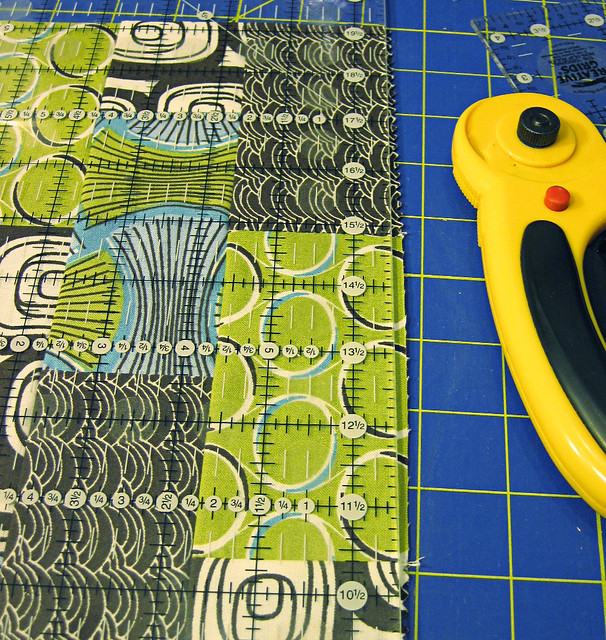
Once you have all rows sewn, trim your block, cutting only the minimum necessary to make a straight edge on all sides.
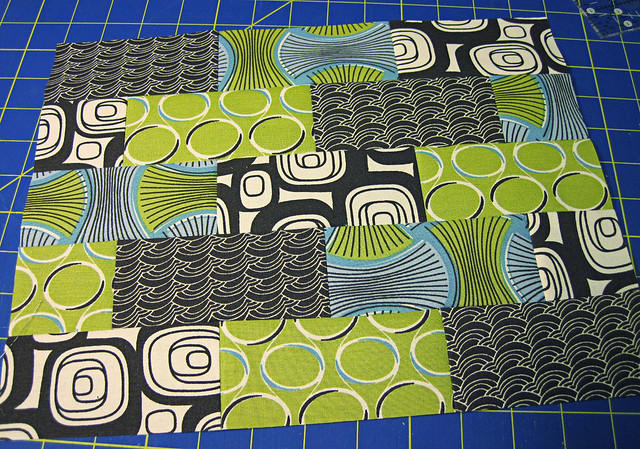
When you're all done, your block should look like this:
...and your leftover scrap pile like this:
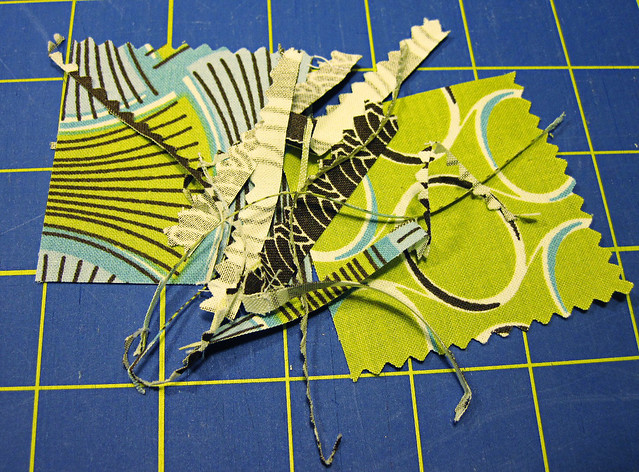
I know, not much for building a stash, but pretty awesome for trying to use all your fabric!!
Now, if you were wanting to make a square you could either adjust the original layout (before sewing) and cut more strips into squares to fill holes. Alternatively, you could trim to a 10.5" square in the final step and have more for your scrap bin. Either way would work just fine.
I hope you enjoy this block! Be sure to keep an eye on the Daisy Janie blog for pictures of the quilt. I can't wait to see how it turns out.
Oh, and if you make a block using this tutorial, please add it to the Stitching by Starlight flickr group. I'd love to see it!!


The instructions were simple... make a block.
No specific pattern, no size limitations, etc. Just make a block using the fabric she sent. I played around a bit in my mind and ended up with this:
And here's a tutorial for it!
One small note... this is a rectangular block. Finished size is approximately 10.5" x 14.5". However, if you wanted to make it a square, it would be easy enough to alter. I wanted to use as much of the material as possible, thus the rectangle shape.
To start, choose eight 5" (charm) squares.
Featured here are (left to right) Hip Squares, Crystal Ball, Caravan, and Bundles from Daisy Janie's Geo Grand collection.
Cut each square in half to make a total of sixteen 2.5" x 5" strips.
Once cut, lay out your strips in such a way that they look like bricks stacked on top of each other. I chose to lay mine out in a stairstep fashion, alternating the green and blue with the browns.
As you can see, some strips will hang off the sides. For one of them, you will need to cut a strip in half to fill in the hole on the second row (see below). I cut the brown (bottom right) to fill in the hole (top left) so that the pattern continued.
For the other danglers, you have two options on cutting.
Option 1: cut them into 2.5" squares like so...
...and attach them when sewing.
Option 2: leave them as-is and attach, trimming at the end.
I chose both - I chose to cut the Bundles (green/blue) strip and leave Crystal Ball (green circles) strip so you could see each.
Now, using that infamous scant 1/4-inch seam, sew your strips together to create five rows.
You should end up with something like this (remember, the green is the dangler I left in):
Don't panic if the rows aren't the exact same length. Some have more seams than others, which cuts down on the row length. For instance, in the photo above, you can see that the fourth row down is shorter than the row above and below it. That's OK.
Now, because the rows are uneven, we aren't going to line them up at the edges to sew them together. Instead, center the rows by folding the top one in the center, finger-pressing (no iron needed), and matching the crease to the seam below it in the second row.
Clear as mud? OK step by step...
Take Row 1 (at the top) and fold it in half.
Finger press to make a slight crease.
Pin to Row 2 (right sides together) so that the middle seam of Row 2 matches up with the crease you just created in Row 1.
Sew Rows 1 and 2 together, using a scant 1/4" seam.
Continue the same process by finding the center and sewing each row together, folding to create a crease and matching it to the center seam in the adjacent row.
Once you have all rows sewn, trim your block, cutting only the minimum necessary to make a straight edge on all sides.
When you're all done, your block should look like this:
...and your leftover scrap pile like this:
I know, not much for building a stash, but pretty awesome for trying to use all your fabric!!
Now, if you were wanting to make a square you could either adjust the original layout (before sewing) and cut more strips into squares to fill holes. Alternatively, you could trim to a 10.5" square in the final step and have more for your scrap bin. Either way would work just fine.
I hope you enjoy this block! Be sure to keep an eye on the Daisy Janie blog for pictures of the quilt. I can't wait to see how it turns out.
Oh, and if you make a block using this tutorial, please add it to the Stitching by Starlight flickr group. I'd love to see it!!

Great tutorial - I really love your "bricks "!!
ReplyDeleteThis is a great tutorial......I liked it so much that I gave it a try with two packs of charm squares that I'd picked up at JoAnn Etc. to make a table mat for my DIL to give to her Mom in Oct for her B-day.
ReplyDeleteA picture of the finished quilt top will be on my blog in a jiffy.
Thank you SO much!
Karen
Thanks so much for your easy to follow instructions, they are great. An 83 year old granny in Tenn.
ReplyDeleteThanks!
ReplyDeletei like the fact that this is universal....girly...guys...country...mod...kids..babies..whatever fabric you chose it to be. thanks
ReplyDelete