Ever since I made my first mug rug, I've been hooked. I've participated in several swaps and made a few as gifts, too. They seem to be the perfect project...easy to design, very unintimidating (compared to an entire quilt), great scrap busters, and simple enough to finish in a very short amount of time. I love them!
This is one that I made back in May for a swap. I decided to make a tutorial for it. It's based on a basic log-cabin block, but I wanted it to be rectangular in shape, so I off-set it just a bit.
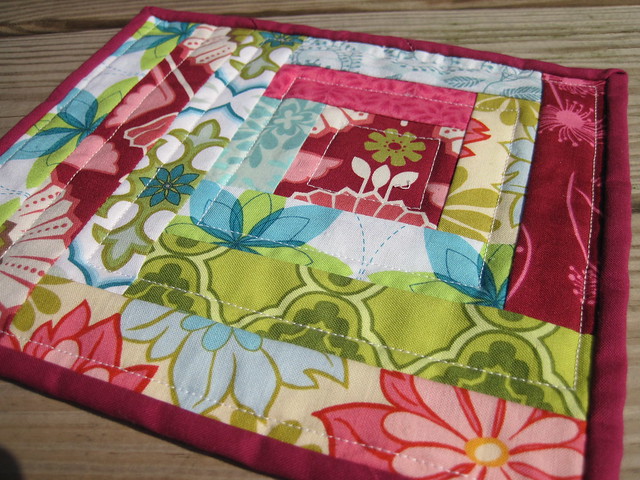
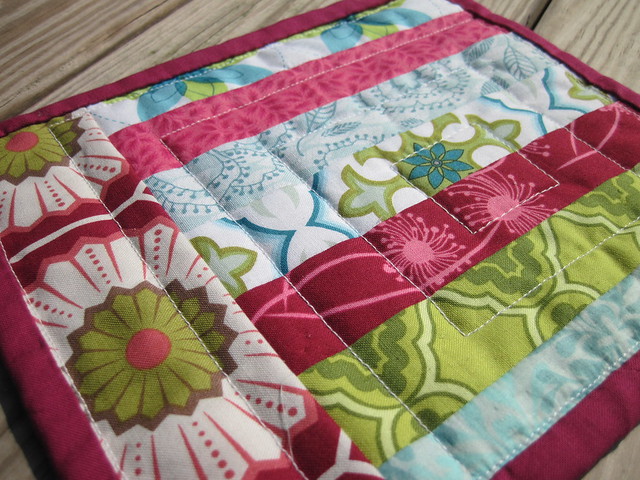
And, of course, you knew I'd make it reversible...LOL!
So.... on with the tutorial!
Start by gathering scraps from you scrap bin, and match them up with good color and contrast. You'll need one 2-1/2 inch square (I fussy-cut mine) and several 1-1/2 inch wide strips of varying lengths.
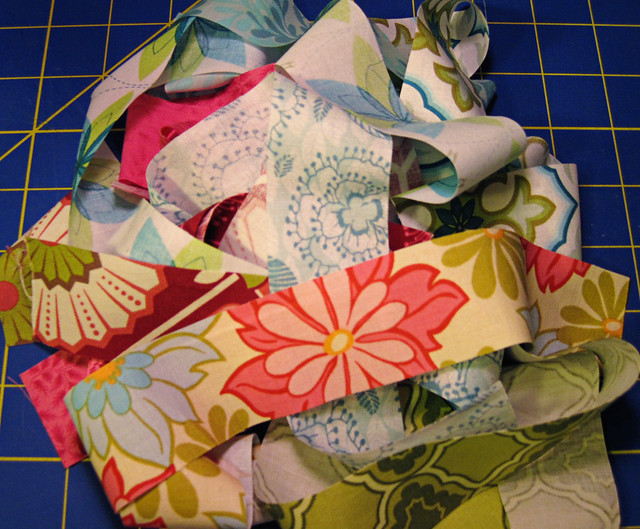
Now, to those who like hard-and-fast measurements at the beginning, I apologize. But I didn't measure these out first. Hang with me and you'll see what I mean. :)
Starting with your 2-1/2 inch square, attach a 1-1/2 inch strip to each side, trimming as you go, to make a square.
Basically, you start at one end, sew the strip, press your seam, and them trim off the excess. (I pressed all of my seams toward the outside of the block.)
Voila! Round 1 complete.
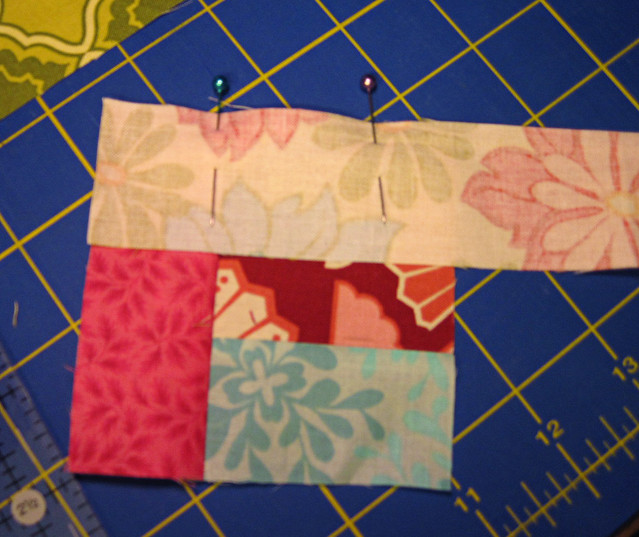
For Round 2, continue adding "logs" to the block one side at a time, trimming as you go. I find it helpful to pin at my seams, but these are so small you may or may not want to.
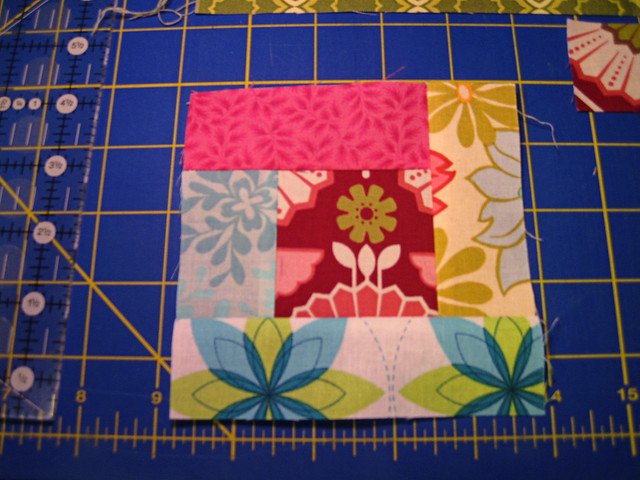
Once you have Round 2 done, it's time to offset. At this point -- especially if you fussy-cut your center square -- decide which way is up. Add a log to the bottom of your square, press and trim. Then, just as if you were working around the square, add a log on the left. Repeat, adding one more log on the left.
Once trimmed, it should look like this:
Now, for the back.
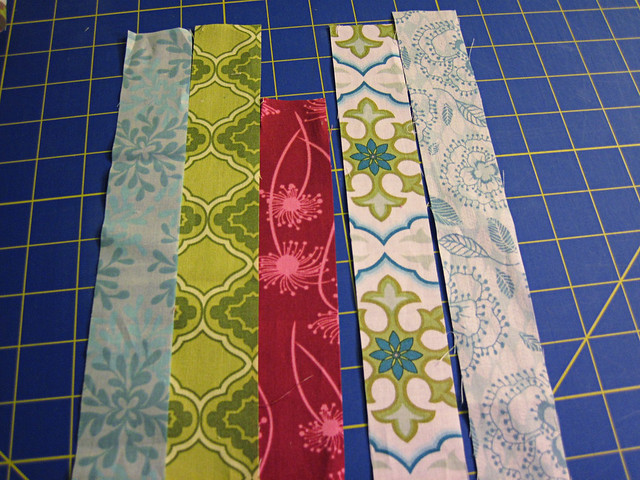
Choose five of your strips (or you could use five totally different strips) that are a bit longer than the width of your mug rug top. Sew them together, matching ends at one side, to make a strip set.
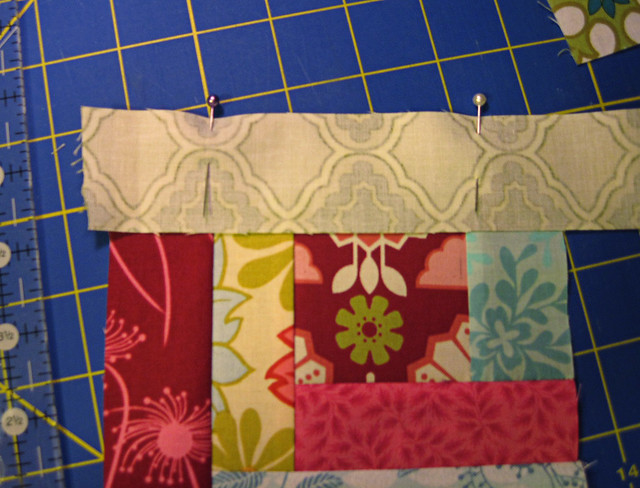
Add a vertical strip to the even (matched) side of your strip set.
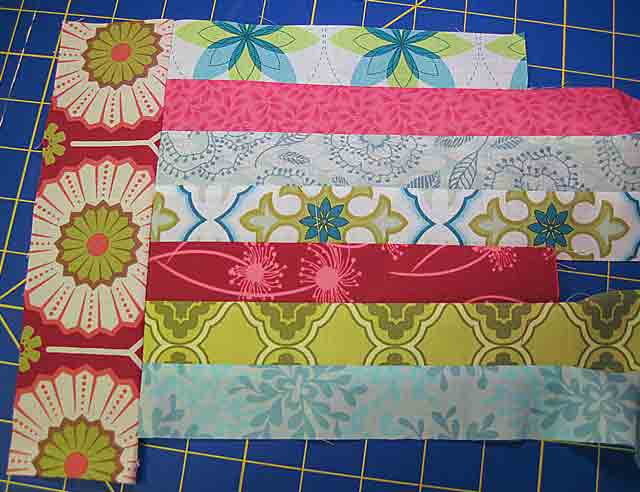
Trim. Now you have front and back.

For basting, line up the vertical strip on the back so that it is pretty close to the edge on the front - this will keep you from loosing too much of the vertical strip when trimming at the end.
Baste and quilt - I used a simple straight-line stitch, but there are many options to quilting this. Once finished, bind as you normally would a quilt, but consider using a thinner strip. I use a 1-1/2 inch strip for binding my mug rugs as a wider strip seems to overwhelm the mat. Test first - you may need to adjust needle placement for a less than 1/4-inch seam.
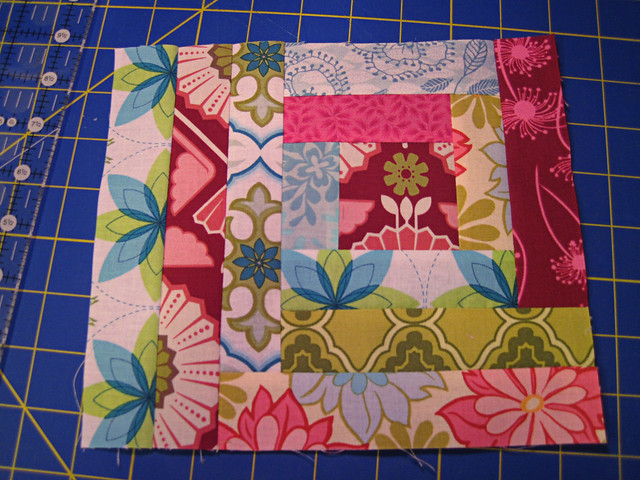
Your finished project should look something like this:
I hope you enjoy using this tutorial. As always, please let me know what you think and if you make a mug rug using this, be sure to upload it to the Stitching by Starlight Flickr group!


This is one that I made back in May for a swap. I decided to make a tutorial for it. It's based on a basic log-cabin block, but I wanted it to be rectangular in shape, so I off-set it just a bit.
And, of course, you knew I'd make it reversible...LOL!
So.... on with the tutorial!
Start by gathering scraps from you scrap bin, and match them up with good color and contrast. You'll need one 2-1/2 inch square (I fussy-cut mine) and several 1-1/2 inch wide strips of varying lengths.
Now, to those who like hard-and-fast measurements at the beginning, I apologize. But I didn't measure these out first. Hang with me and you'll see what I mean. :)
Starting with your 2-1/2 inch square, attach a 1-1/2 inch strip to each side, trimming as you go, to make a square.
Basically, you start at one end, sew the strip, press your seam, and them trim off the excess. (I pressed all of my seams toward the outside of the block.)
Voila! Round 1 complete.
For Round 2, continue adding "logs" to the block one side at a time, trimming as you go. I find it helpful to pin at my seams, but these are so small you may or may not want to.
Once you have Round 2 done, it's time to offset. At this point -- especially if you fussy-cut your center square -- decide which way is up. Add a log to the bottom of your square, press and trim. Then, just as if you were working around the square, add a log on the left. Repeat, adding one more log on the left.
Once trimmed, it should look like this:
Now, for the back.
Choose five of your strips (or you could use five totally different strips) that are a bit longer than the width of your mug rug top. Sew them together, matching ends at one side, to make a strip set.
Add a vertical strip to the even (matched) side of your strip set.
Trim. Now you have front and back.
For basting, line up the vertical strip on the back so that it is pretty close to the edge on the front - this will keep you from loosing too much of the vertical strip when trimming at the end.
Baste and quilt - I used a simple straight-line stitch, but there are many options to quilting this. Once finished, bind as you normally would a quilt, but consider using a thinner strip. I use a 1-1/2 inch strip for binding my mug rugs as a wider strip seems to overwhelm the mat. Test first - you may need to adjust needle placement for a less than 1/4-inch seam.
Your finished project should look something like this:
I hope you enjoy using this tutorial. As always, please let me know what you think and if you make a mug rug using this, be sure to upload it to the Stitching by Starlight Flickr group!

This is a wonderful tutorial. Really love the mug rug.
ReplyDeleteA set of these would make such a wonderfull thoughtful gift for anyone..I'm already gathering my scraps..the size alone make these such fun to make..Thanks for the pattern..
ReplyDeleteI'm really liking the idea of a Christmas gift basket of different mug rugs! Thanks for this tute
ReplyDeleteLove this placemat!! I have pinned it on my Quilt and Sew Pinterest board - hope you don't mind as I would like it for future reference. Also wanted you to know that I am now following your blog and looking forward to more inspirin projects!!
ReplyDeleteI love this mug rug! It is so nice looking. I believe I will try to make some of these for Christmas gifts. Thanks for sharing.
ReplyDeleteWell this should be fun.. I have so many Scraps from My Christmas Runners... No I can make matching Mug Rugs... :-)
ReplyDeleteThis will be so much fun... I have so many left over Scraps from my Christmas runners Now I can Make some Mug Rugs to match... awesome... I just made a Christmas Runner that is Log Cabin... so this will work...
ReplyDeletethank You.. for sharing..